Building Your First Guitar Amplifier; The 1/2W "Little Gem"
This tutorial will take you through the process of building the Little Gem practice guitar amplifier with a 3" arduino speaker.
1. Gather Materials
- Speaker
- LM386 IC
- 0.01 Cap
- 100uf Cap
- 0.047 Cap
- 220uf Cap
- 5K Linear Gain Potentiometer
- 10ohm resistor
- 9v Battery Clip
- 9v Battery
- On/Off Switch
- 1/4 Mono Jack
- Some kind of enclosure
- Small perf board
Parts required:
- Drill
- Soldering iron
- 3" hole saw bit
- 3/8" drill bit
Tools required:
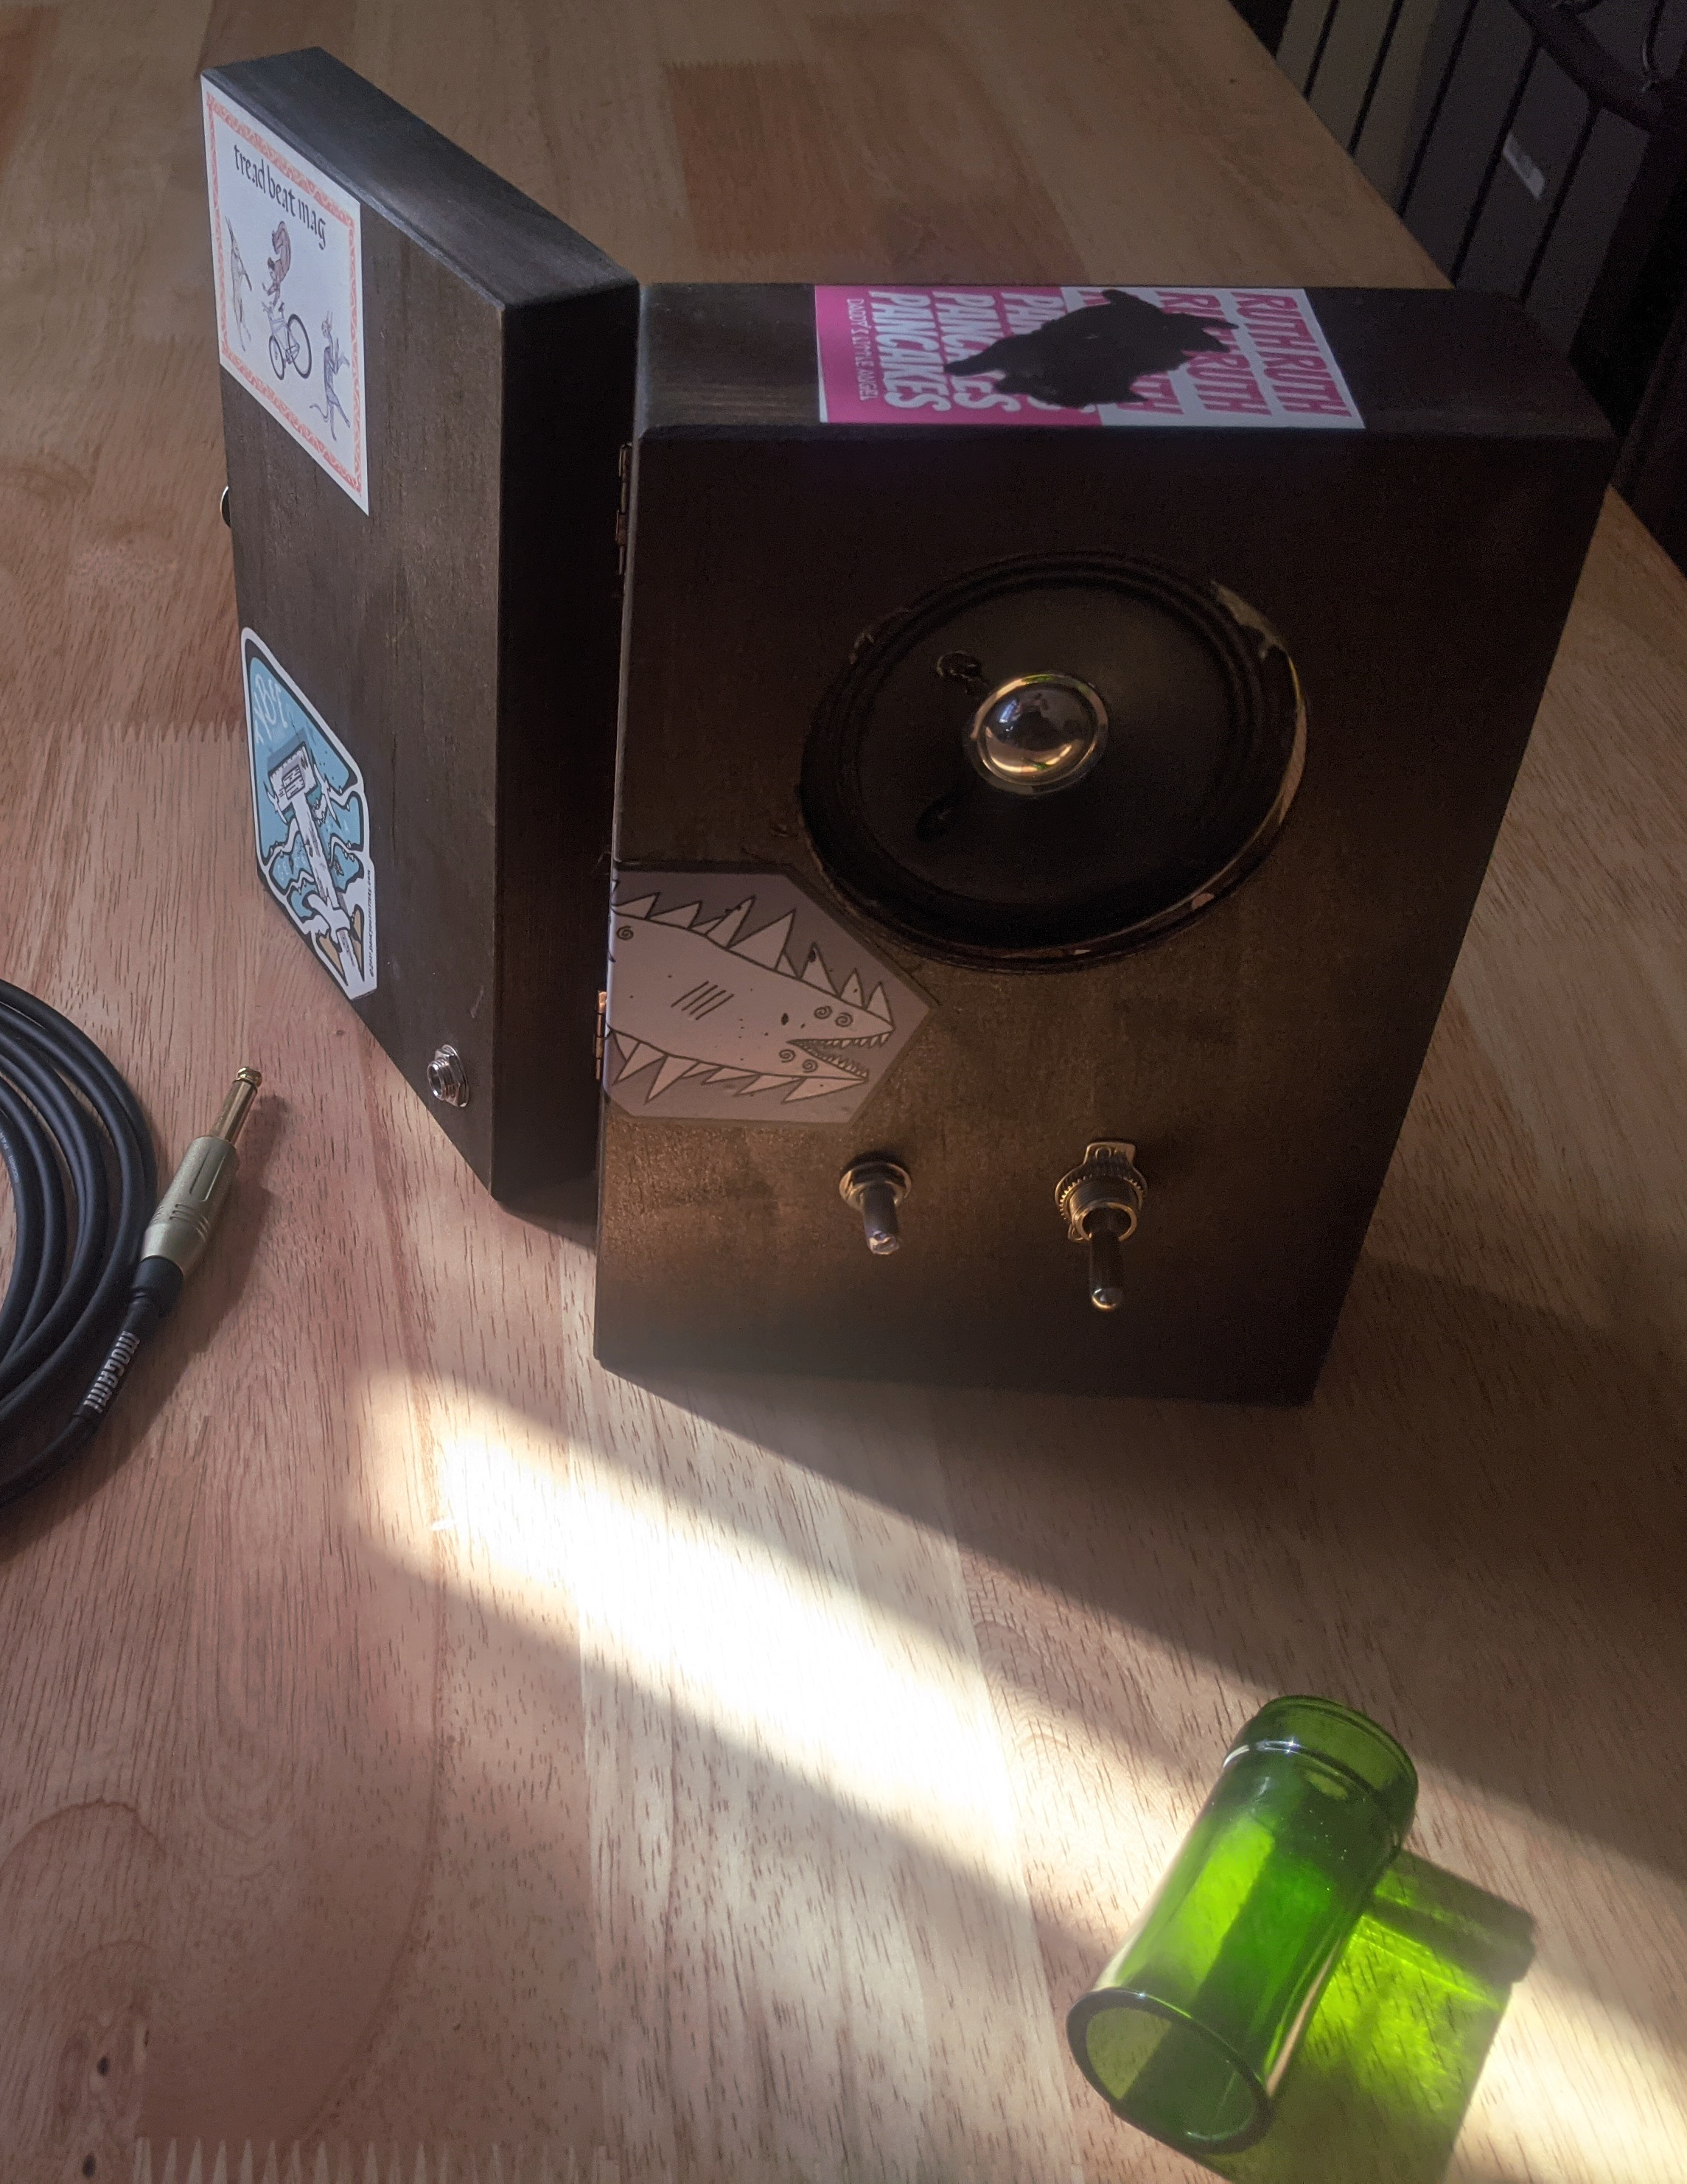
2. Prepare your enclosure
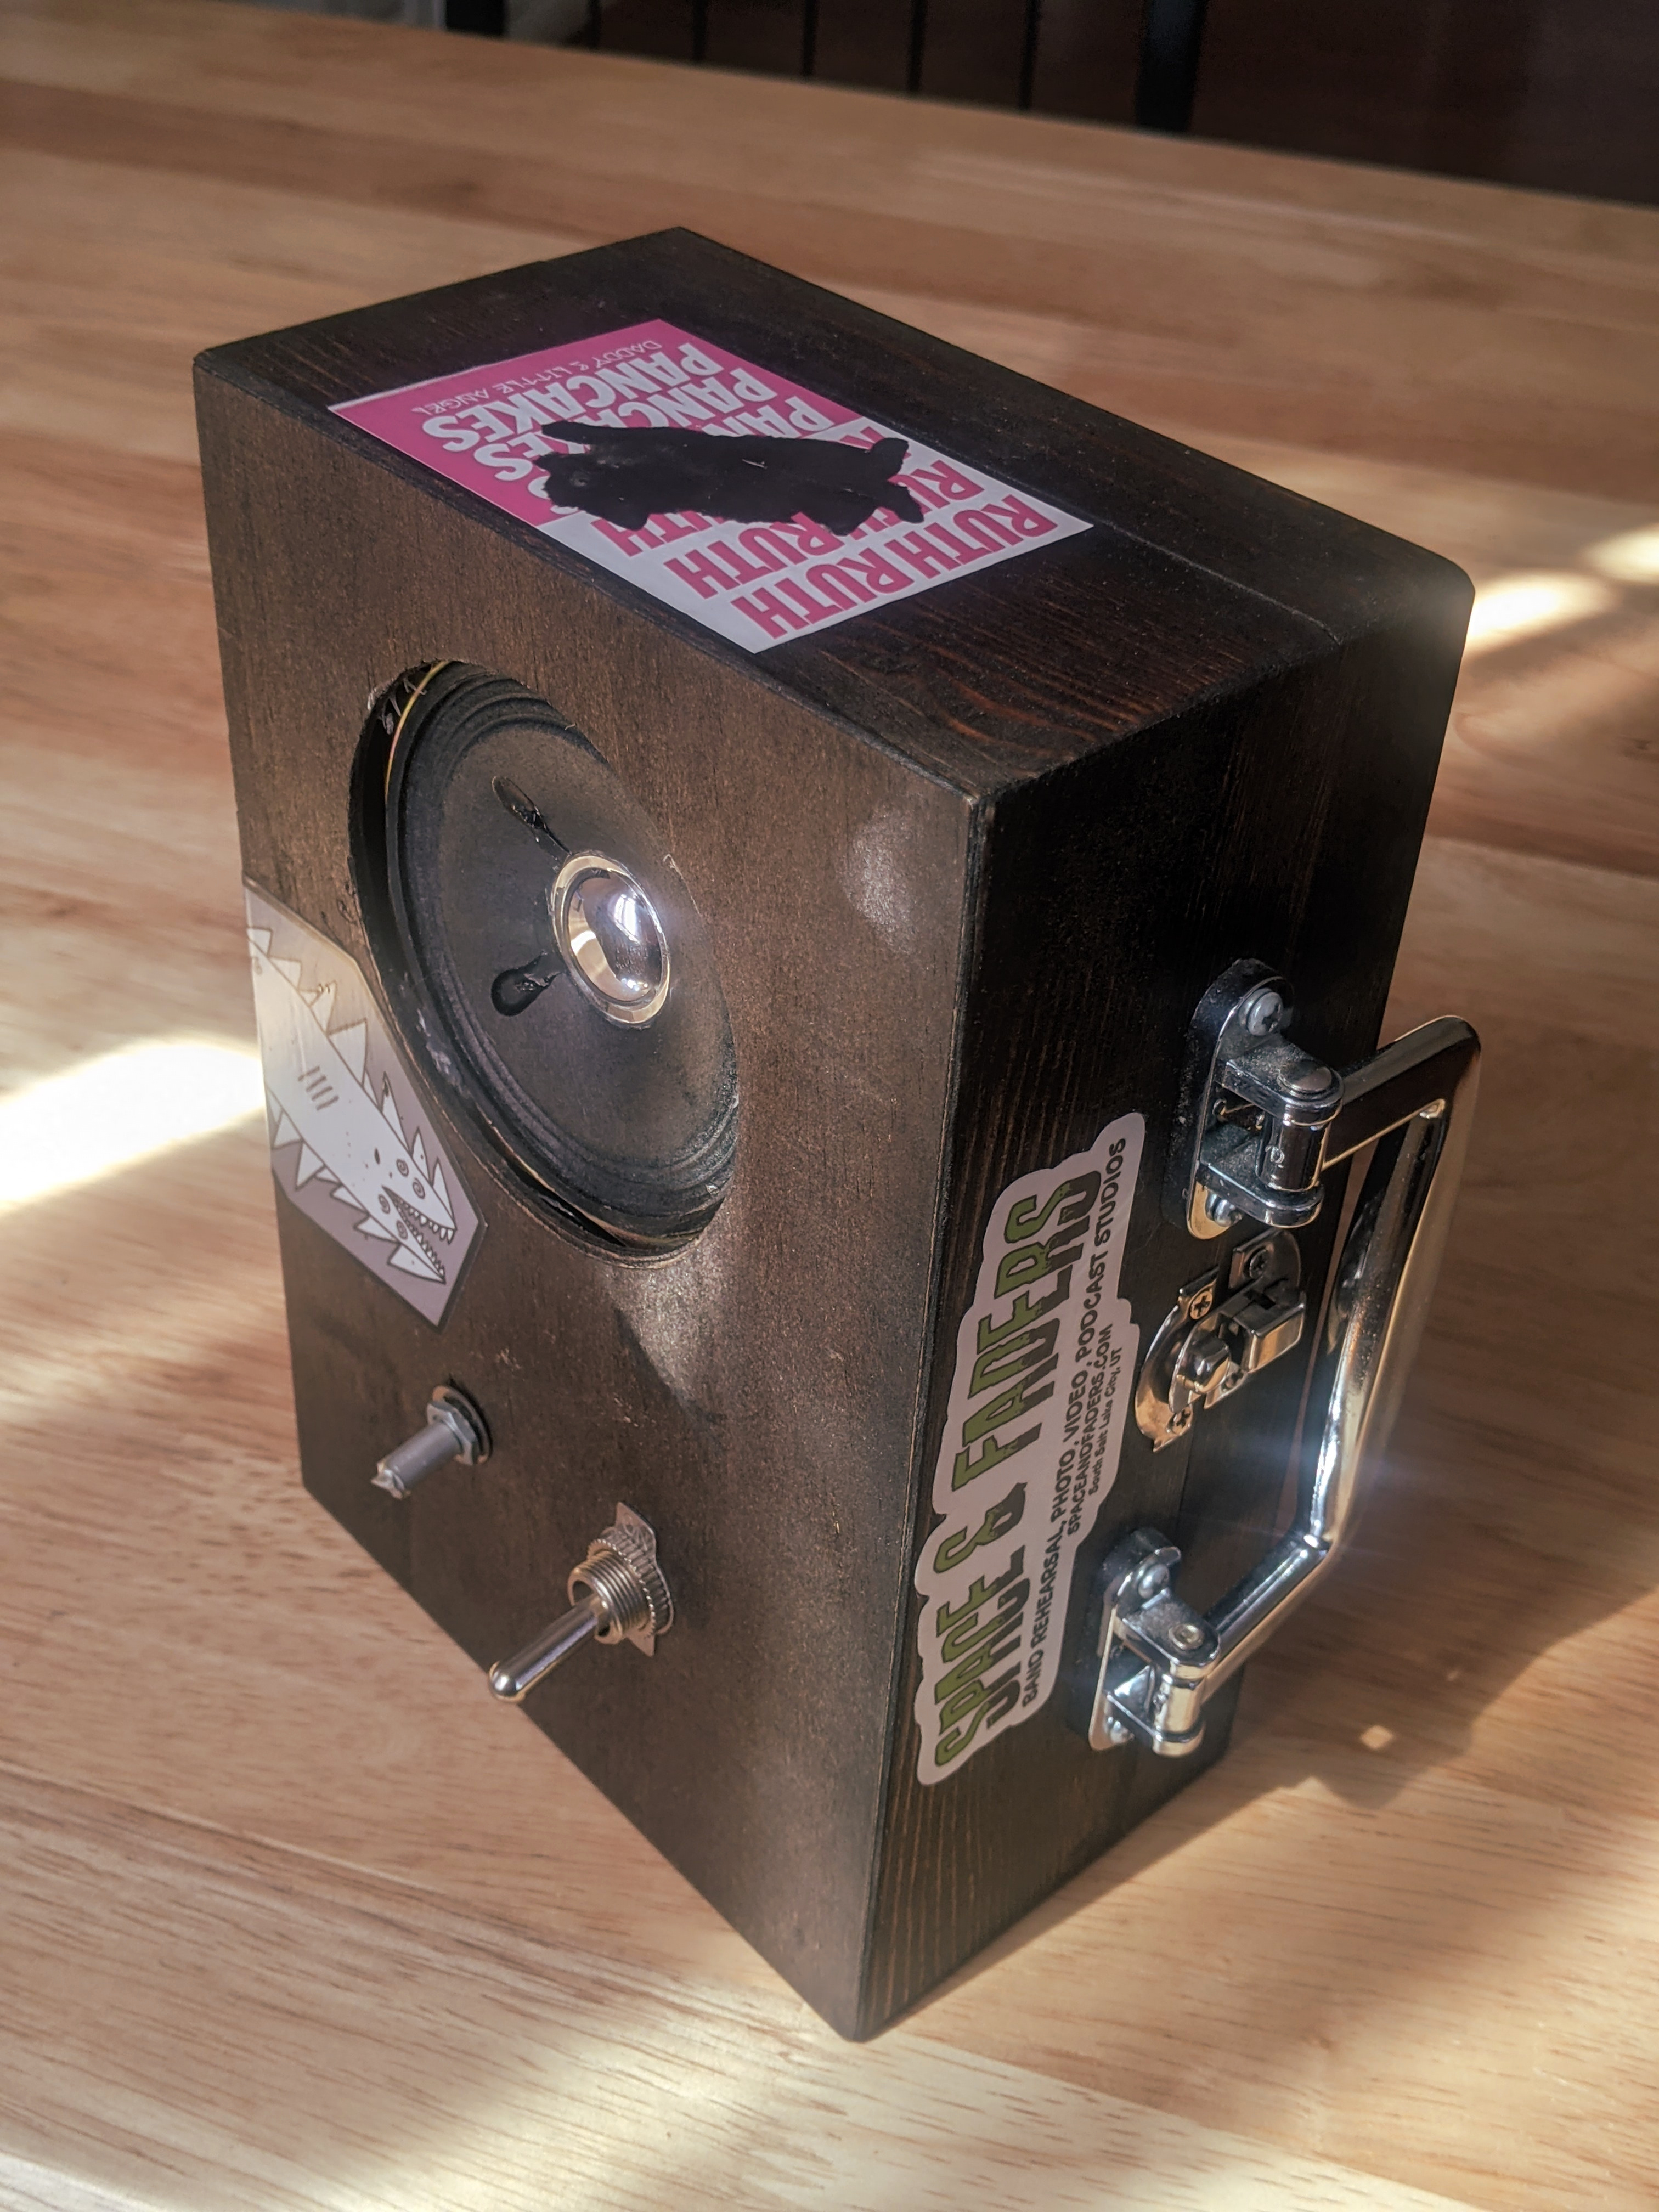
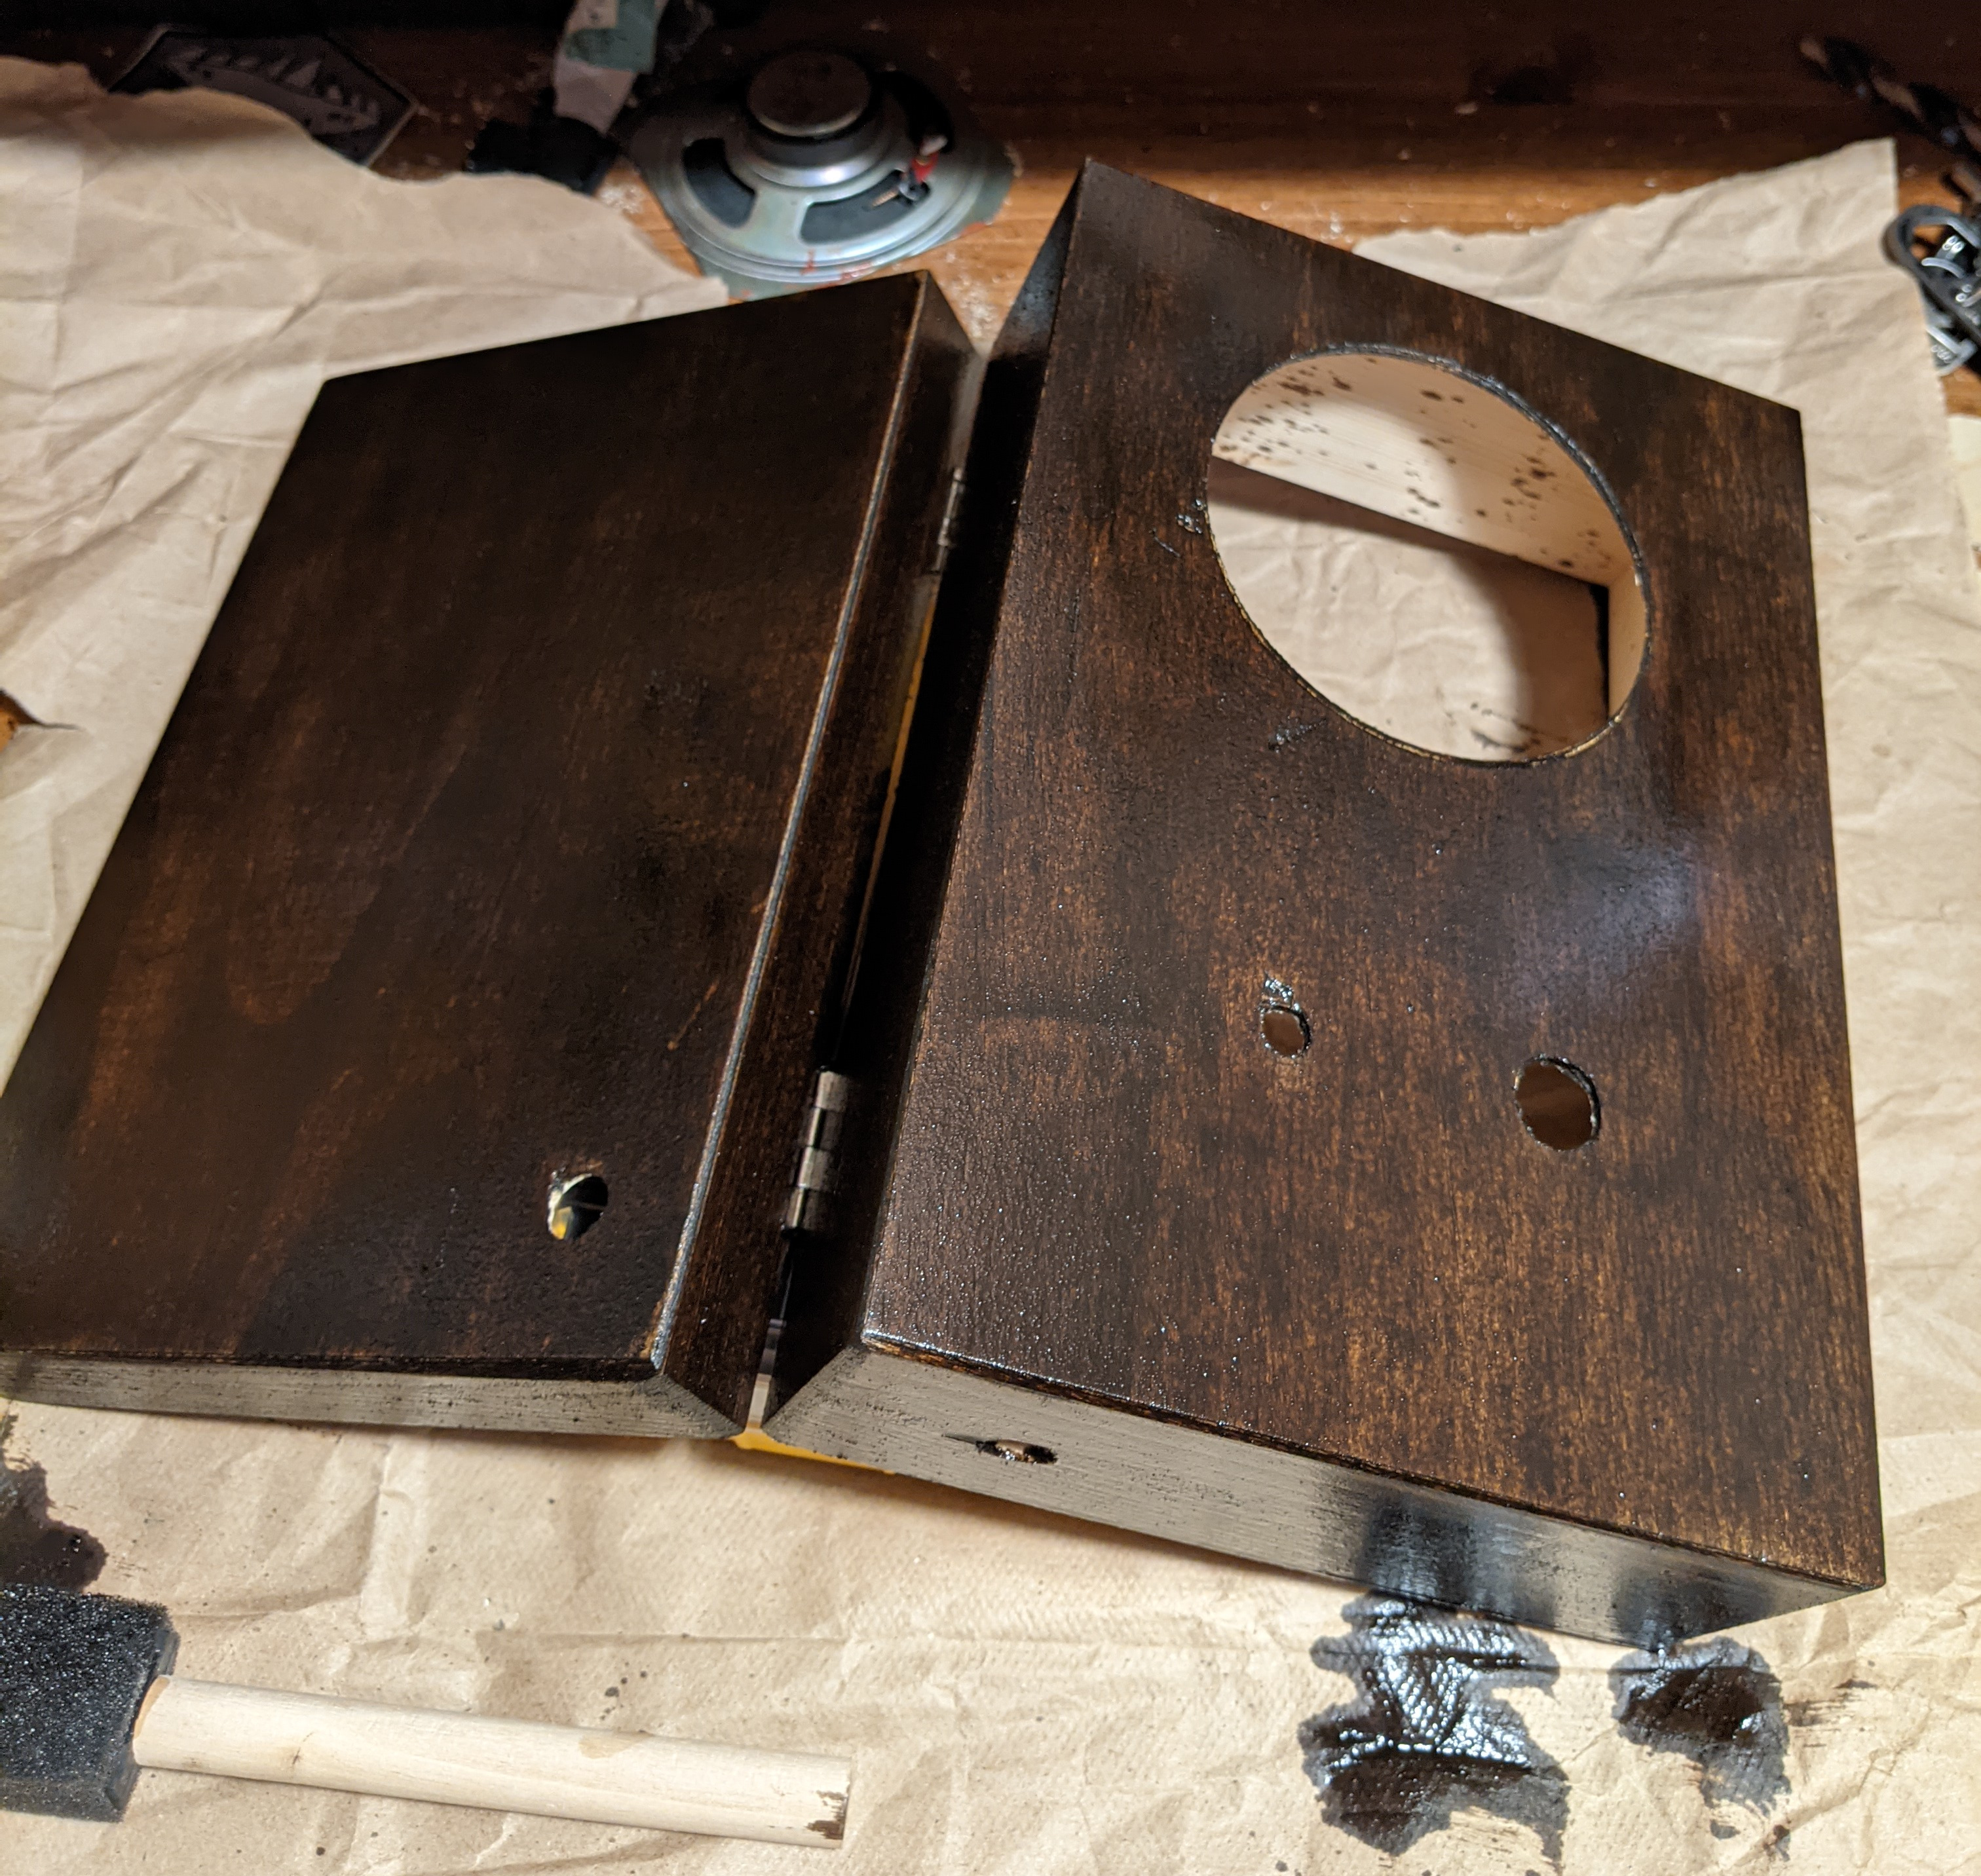
Choose an enclosure for your amplifier. The enclosure is the container in which your speaker and circuit will sit. The size and materials of the enclosure will effect the resonance and projection of your sound.
There is a lot of flexibility in what you can choose as an enclosure. The most important thing is to find something hollow that will give the sound some space to breath.
Prepare your enclosure by creating an opening for the speaker using a 3" hole saw bit. If you have chosen to use a different sized speaker, you will need to choose a hole saw bit that matches the size of your speaker. You will also need to drill a 3/8" hole for the input jack. The power switch and gain potentiometer will also need 3/8" holes or 1/4' inch holes depending on the parts you've sourced.
If your enlosure requires any extra finishing work such as staining or painting, it is recommended that you complete that during this step.
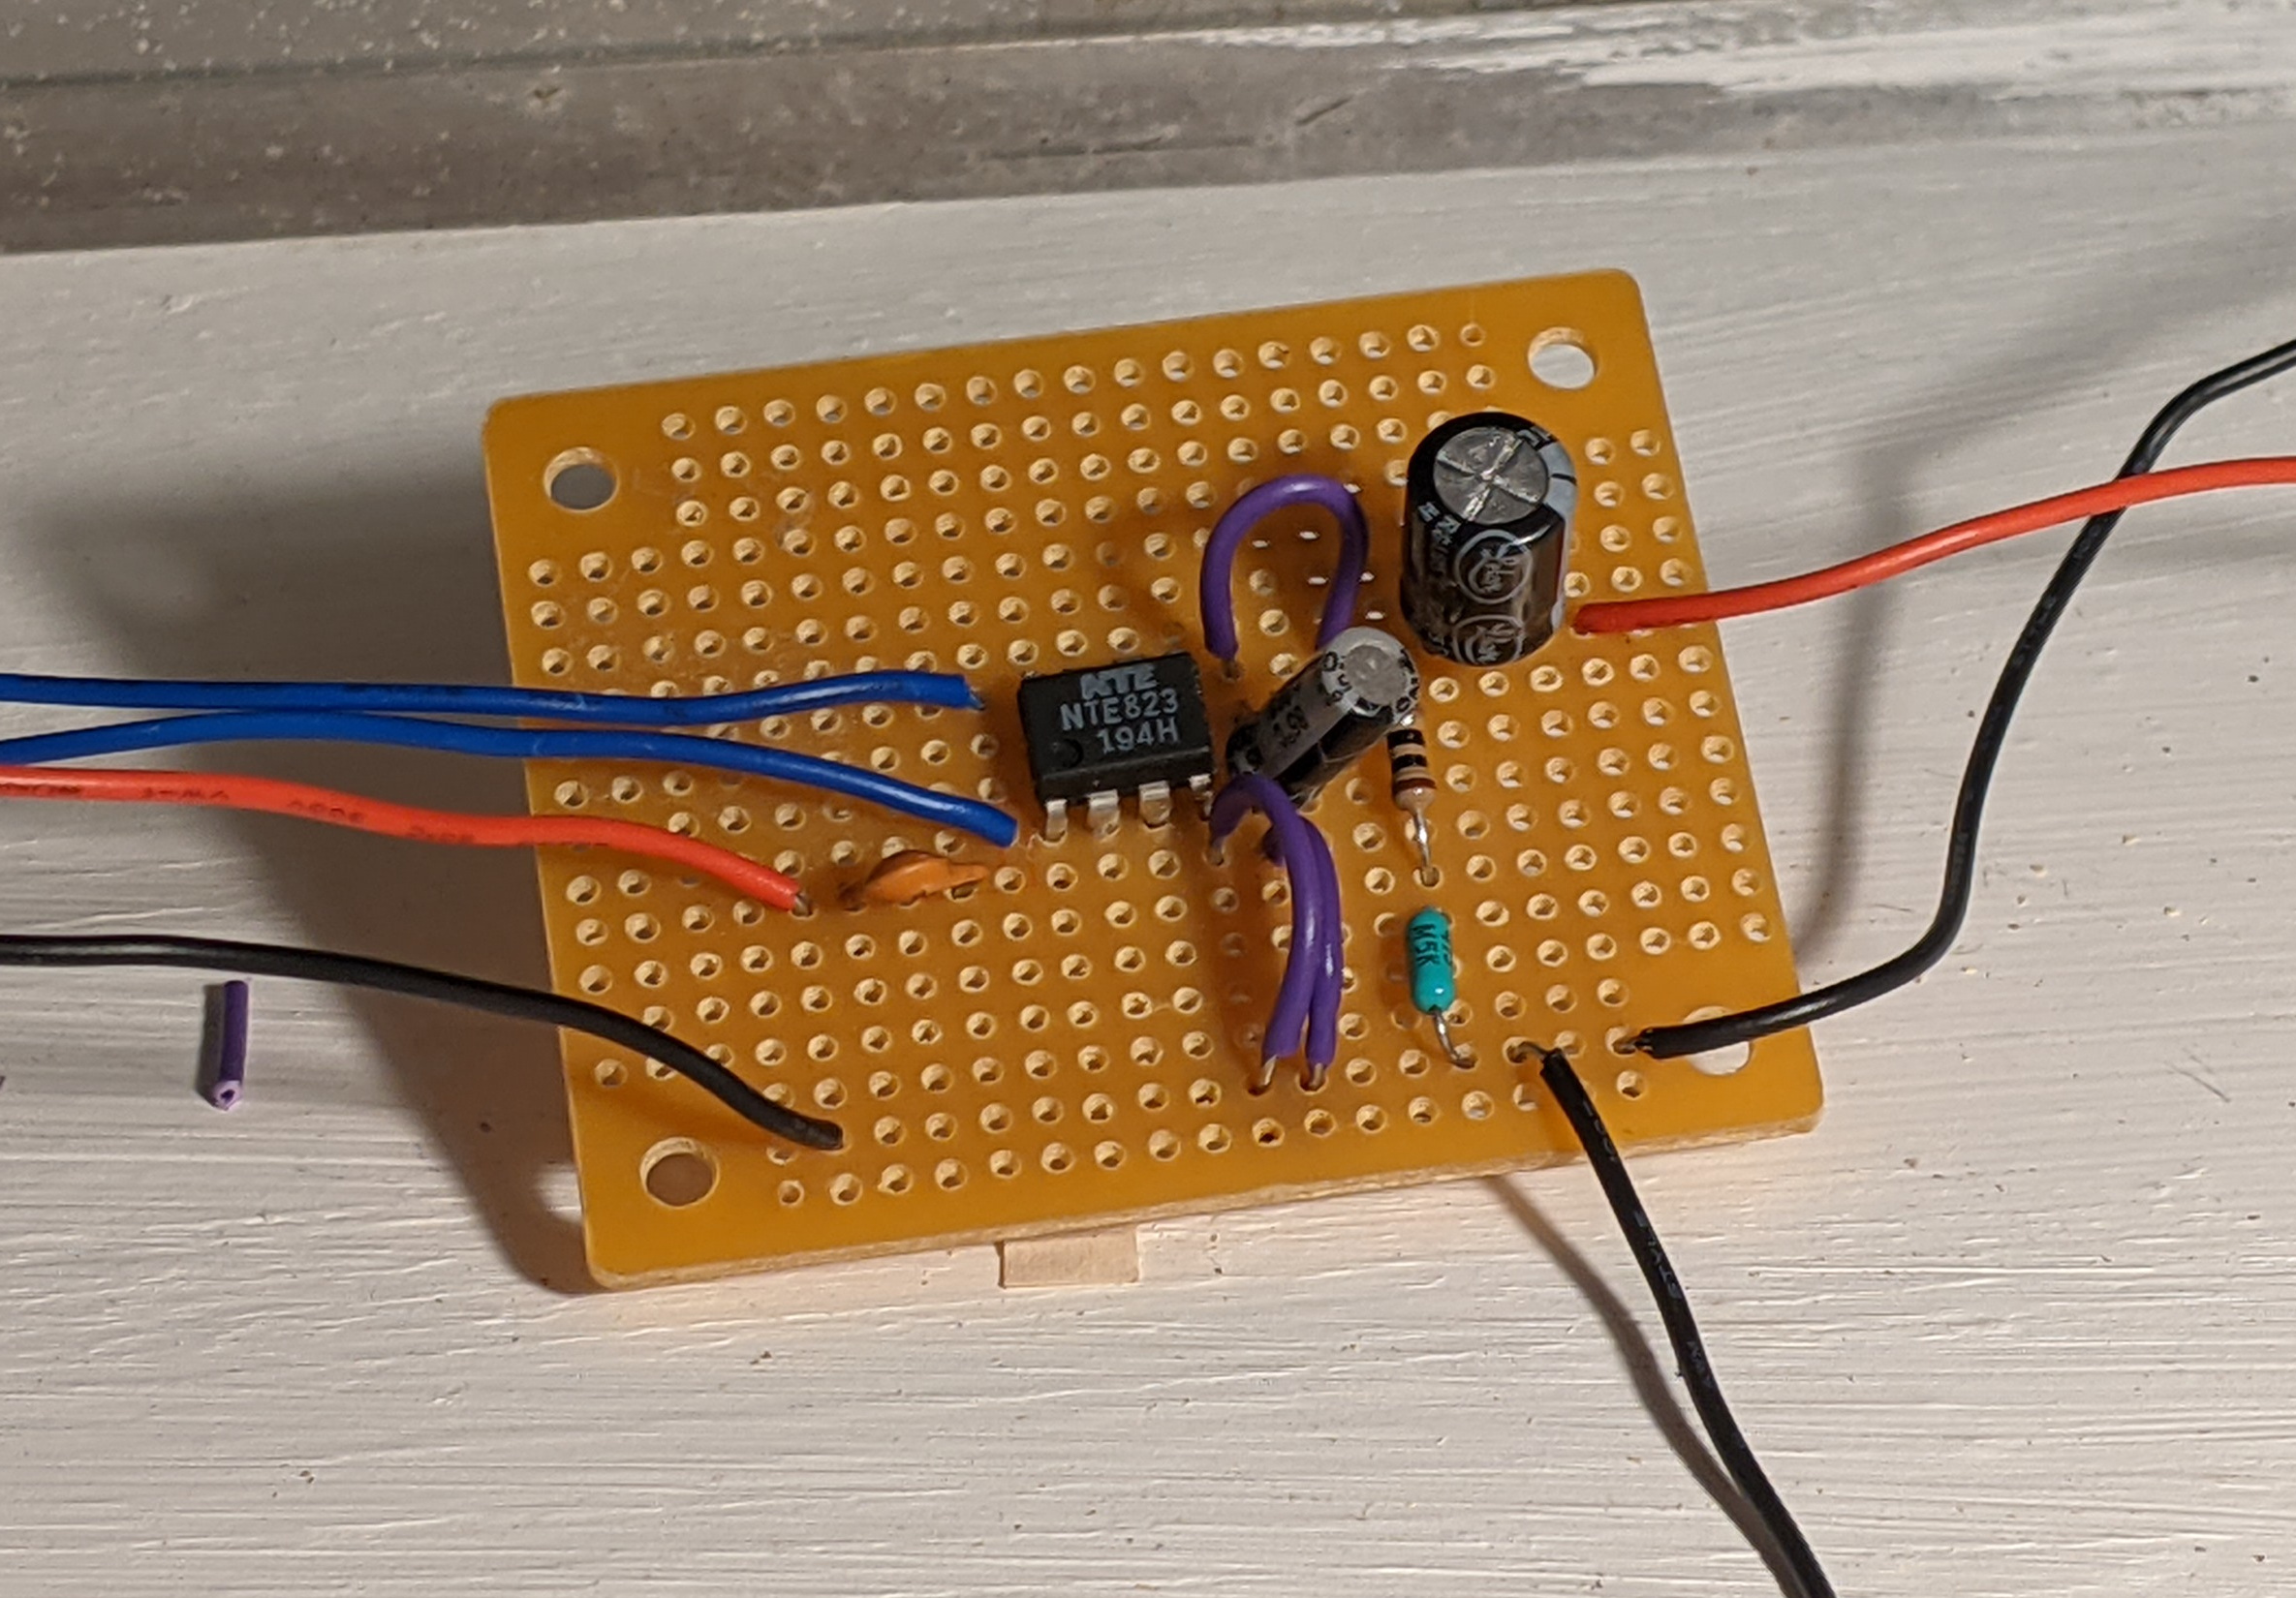
3. Build the circuit
Solder the circuit using the image below as a guide. It is important that you pay attention to the polarity and orientation of the components. Polarity refers to the direction in which current will flow through a component. Make sure that the LM386 IC is oriented correctly, as each of its pins serve a specific purpose and need to be connected to the correct components.
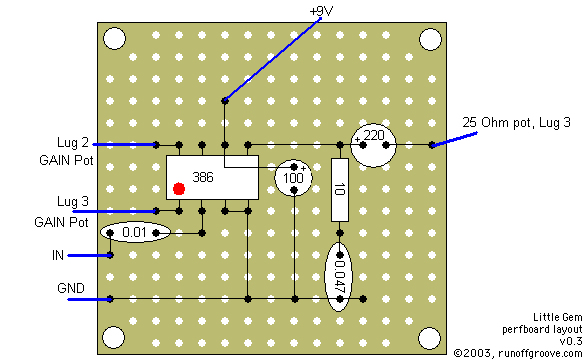
There is quite a bit of space between some of the components. You can bridge the gaps between these components by drawing a line of solder on the perf board. Alternatively, you may also use some extra lengths of wire to bridge connections in between these components. The purple wires below demonstrate how to bridge the gap between connected components with space in between.
4. Test your amplifier
After preparing your enclosure and building your circuit, its time to test your amplifier. You can use tape to temporarily attach your speaker to the inside of the enclosure. This helps ensure that you can easily remove it in case you need to go back and troubleshoot problems with your circuit.
While its possible to test the amp without the enclosure, it is recommend to test it within some type of enclosure. It is very difficult to get a good idea of the sound quality when the speaker is sitting on its own. The enclosure is crucial for projecting the sound coming from the amp. If you decide to test your amplifier without an enclosure, there may be unwanted buzzing.
5. Enjoy!
There is also a 1W version of this amp, the Little Gem MKII, if you want to push a little bit more sound using only a 9v battery.